Saturday 31 August 2013

Light make up can make you sophisticated enough !

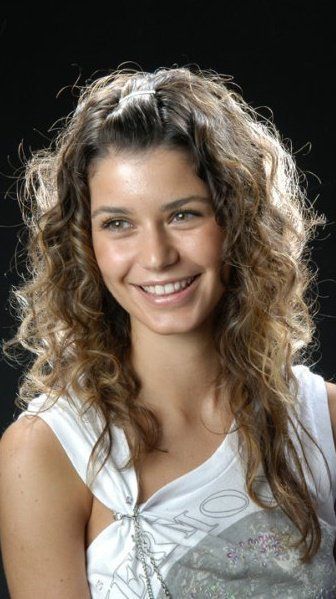
Some times we don't want to put a heavy make up but to stay simple with exquisite look !
Then what we have to do for that is a question that always disturb us.
Here is a quick & easy solution for your question.
Use it & look simple+beautiful...
I mean simply Beautiful ;)

Here are experts tips for fresh, flawless makeup that looks, well, like you’re not wearing makeup.

Start by Perfecting Your Skin

So that makeup blends in easily‚ first wash with cleanser and a cloth to gently exfoliate your face, says Tom Pecheux‚ creative makeup director for Estée Lauder.


1. Moisturize and Even Out Skin Tone

The fastest, most natural way to do this is with a tinted lotion, like La Mer The SPF 18 Fluid Tint, which also contains sun protection . Because it’s sheer, you don’t have to match it to your skin exactly, as you have to do with foundation. You can even go slightly deeper to warm up your complexion, says New York City makeup artist Polly Osmond. Apply it like a basic moisturizer.


2. Conceal Any Flaws

For visible breakouts or deep under eye circles, use a pigment-rich concealer, like Chanel Long Lasting Corrective Concealer. Its small applicator deposits just the right amount of makeup, which is key. “The trick is not to use too much concealer,” says Osmond. “That just accentuates problem areas.” For blemishes, dab, blend, and build up coverage in thin layers. For dark circles, swipe the wand under your eyes, then pat with a finger to blend.


3. Use Powder If Needed

If your skin gets shiny, follow with an oil-absorbing powder. (Note: If your skin is very oily, skip the tinted moisturizer and use only concealer and powder.) Swirl on Bare Escentuals Bare-Minerals Matte SPF 15 Foundation using a brush and a circular motion; this will leave an undetectable veil of cover-up.

4. Pick a Warm Cheek Color

Cream blushes in warm peaches or pinks “give skin a natural, subtle flush,” says Pat McGrath, the global creative design director for P & G Beauty. Cool pinks, on the other hand, look more made-up. (Unfortunately, the blush shown is no longer available.)

Now Define Your Eyes and Lips

To make sure you’re using the lightest touch, do your makeup in daylight, if possible. Prop up your mirror near a window.

5. Shade Eyelids

A soft, brownish tint enhances your eyes’ natural contours without showing up as shadow. “Choose a shade slightly darker than your skin,” says McGrath. “Brush it into the creases and along the lower lashes, making sure there are no hard edges.” For extra eye brightening, she applies CoverGirl Eye Enhancers in Champagne to the centers of the lids, the brow bones, and the inner corners of the eye.

6. Dot on Eye Pencil (Optional)

If your eyes need a little extra definition (or you want a slightly less bare look for evening), lightly dot a soft gray or brown pencil between the top lashes. Try Shiseido Makeup Smoothing Eyeliner Pencil in Brown.

7. Subtly Amp Up Lips

To get a pretty tint (that also lasts), pick a shade that matches your lips exactly and press the color into your lips with your fingertip rather than applying it directly from the tube. Concentrate it in the center and blend out. Try Aveda Uruku Color Gloss in Verbena instead, a sheer, universally flattering berry.


8. Enhance Lashes

Defined lashes are essential, even for a no-makeup look. “You can forfeit shadow and liner but never mascara,” says Osmond. Apply two coats to the top lashes (if they’re blond, use brown mascara; if darker, brownish black). Try Clinique Naturally Glossy Mascara . For a boost, use a flat eyeliner brush to grab a bit of mascara from the wand and apply to just the roots of the bottom lashes. “Coating the lashes entirely creates a spidery effect,” cautions Pecheux.

And now you are ready to attend any occasion with such a simple look full of grace & beauty.


The Lovers of Valdaro

The Lovers of Valdaro.
This burial of a young man and woman, lying face to face, with their arms and legs entwined in an apparent eternal embrace was discovered by archaeologists near Mantua in Italy. The burial, which dates from the Neolithic period, was excavated as a single block so the two ‘lovers’ would not have to be separated.
share with others...
This is the definition of LOVE...

Friday 30 August 2013

Any Resemblance Between John & Engin ???

People say Engin Akyurek is so John Abraham with hairs grown up !!
Umm i guess may be !! But not that much ...
Both have their own different personalities!!
I adore John alot. He is the only Indian actor i like.
The same way i love Engin too.
But i must say i don't think they are same or if any one copy other in any way !
Both have their own styles & qualities to grab fans..
Engin is comparatively a much talented actor then John.. He is really good at it. He show his every expression with his eyes only. If you can't even dub his dramas in any language you understand,. you can easily know what is going on with him in drama just with his expressions. He is King of Expressions. With so pathetic & feeling less dubbing done as Kareem in Fatmagul drama but still audience drove crazy for him with his expressions only. I don't know what you guys think but this is my thinking. no offense to any one.


Now it come to John ! Yes he is not as talented as Engin but i must say he is the super model in India with millions of fan following. He has quite a different look than Engin. He always has appear on screens with every new look. A fighter in Force , Lover in Desi Boys, Careless child in I, me or main & in many other looks too.
Now i want you guys to decide if they are same or not ??
If yes then how ?
If no then why ?
Waiting for your response ...
Choose your favorite too...!!!

How to Get Smoky Eyes With Makeup

Wanna make your look enchanting ? So that every one will only look at you !! Whether you've got a big concert or a fancy gala to attend, creating a smoky eye can add a bit of sophisticated drama to your look. It would make you more beautiful than you are. Perfecting the smoky eye is not limited to makeup fiends and artists alike, but to anyone with the correct tools and a little know-how. Learn to apply both a classic and dramatic smoky eye with these fast and easy steps.

What i have to do first ?

Choose your colors. Any color can be used to create a smoky eye, although you will need at least three shades of a similar hue. The classic smoky eye is created with black or gray, but bronze and brown are also commonly used.

Then,

Use the right supplies. Although it may be quick and easy to choose the first three complementary shades of eyeshadow you find with a sponge applicator, the perfect smoky eye is created using the right supplies.


  • Using loose powders gives you the best blending ability, which is necessary for creating a great smoky eye. You have the ability to use pressed powders and cream shadows as well, but for the best look find loose eyeshadow.
  • Use pitch-black eyeliner to accentuate your smoky eye. You have the option of using a pencil, cream, or liquid eyeliner, and any will work just fine. Cream and liquid eyeliners give a very smooth finish, while a pencil eyeliner gives a softer blended look.
  • Be sure to use good quality makeup brushes. Using dirty, old, or sponge brushes will create a smeared look that doesn’t blend. The best makeup brush for a smoky eye is a domed eyeshadow brush, which is rounded at the top. You can find these at many beauty supply stores.
  • Be sure have a concealer and eyeshadow primer to prep your lids before applying the smoky eye. Use a concealer brush to apply both.
  • Have a large fluffy brush, makeup remover and q-tips on hand to fix any mistakes or loose shadow on your cheeks.

Apply your face makeup. Before you put on your smoky eye, you should create your neutral palette. Apply concealer under your eyes and on any dark or red spots, and then apply a powder foundation over the top to set it.


  • You have the option of applying blush or bronzer to add dimension to your face. For a bronzer, sweep it into the hollows of your cheeks with a large fluffy brush. To apply a blush, blend it into the apples of your cheeks. Remember to apply both lightly, for the most natural look.
  • Make sure your eyebrows are well-shaped and colored, as the smoky eye will draw attention to them. Having brows that are too thin or light will make your smoky eye look too dark and unnatural.

How To Create a Classic Smoky Eye

Apply your highlighter. Your highlighter is the lightest of your three eyeshadow shades. Using your eyeshadow brush, dab it on the inside corner of your eyelid on both your upper and lower lids. Sweep it directly under your eyebrows as well, from the beginning to the end of your brows.


Put on your medium shade. Take your middle eyeshadow shade and sweep it over your entire eyelid. Be sure to blend it at the inside corners with your highlighter, so that there isn’t a harsh divide between the two colors. Apply it upwards only to the natural crease on your lid, not all the way to the highlighter underneath your brows.

Begin adding your darkest color. Begin at the outside corner of your eyes, and sweep in a ‘C’ shape from the about halfway inwards (from the outside of your face) on the lash line, back up and around to about halfway inwards on the crease of your eyelid.


  • The darkest part should always be the point at the upper edge of your lash line. Whenever you need to apply more of your dark shadow, start at this point and work inwards or upwards.
  • Don’t apply the shadow too far in. You want the inside ⅓-½ of your eyelid to not have any dark shadow. This will help your eyes to look open and bright.
  • To add a dramatic look to your classic smoky eye, sweep your dark eyeshadow to a point (more of a “<” shape than a “C” shape) towards the end of your eyebrow. Make sure that the darkest point still remains at the outside corner of your lash line.
  • Sweep a little of your dark shadow under your eye onto your lower lid. Again, start at the outside corner and bring it only about halfway in. This will help to balance the darkness out on the top of your eyes.
Blend your shadows. Clean your eyeshadow brush with makeup brush cleaner or face soap/shampoo and water. Dry your brush on a clean towel or rag by sweeping it quickly back and forth across the fabric. Then, use your brush to blend the colors together.


  • Start by blending the lightest colors. Make sure that your medium (lid) color does not have a harsh divide with your dark (crease) color. Gently move your brush in a “C” shape at the meeting of these two colors to help them to form a smooth ombre effect.
  • Blend the dark crease shadow outwards towards your browbone. It should have a soft fade into your skin, and should not significantly overlap your highlighter that has been placed under your eyebrows.
Add your eyeliner. If you want a smooth cat-eye look, bring you eyeliner from the inside corner lash line towards the end of your eyebrow. End it in a tapered line slightly before the edge of your eyeshadow (where the darkest part meets your un-shadowed skin). For a smudgy look, draw a thick line across the top of your lash line, and then use your fingertip or a small eyeshadow brush to smudge and blur the line.


  • To add more drama to your smoky eye, tightline your eyes. This is when you use your eyeliner to draw a line on the inner-rim of your eyes, located directly under your upper lashes and above your lower lashes. This can be difficult for some, as it involved using eyeliner very close to your eyeball.
  • Tight line the inner rim of your lash line nearest your tear duct by your nose with a white eyeliner pencil. This will help your eyes to pop, keeping them looking bright even with all the dark smudging above.
Add your mascara. Carefully apply your mascara, wiggling your brush between your lashes to help define them. Add no more than two coats to avoid clumps and an unnatural appearance. Apply a single coat to your bottom lashes to define them without giving yourself raccoon-eyes.

Brush away any excess color. If any eyeshadow or mascara fell onto your cheeks below your eyes, use a large makeup brush to brush it off in quick, broad strokes. If any of your mascara smeared along your eyelid or cheeks, use a q-tip dipped in makeup remover to take it off, and then your blending brush to fix any extra makeup that may have been removed.


How To Create a Dramatic Smoky Eye

Apply your highlighter. Using the same technique as for a classic smoky eye, use your lightest shade of eyeshadow on the inside corners of your eyes and directly under your eyebrow, above your crease. Sweep the highlighter underneath your eyes a bit on the inside corner.


Put your darkest color along the lash line. Instead of starting with your medium shade, take your darkest eyeshadow and use your brush to sweep it along the entirety of your upper lash line. It should be the darkest near the roots of your lashes, and then blend upwards towards your crease.


  • Use a little on the lower lash line, but only near the outer edge. Sweep inwards with your dark shadow, going to only about halfway across your lower lashes.
  • Only use your darkest shadow till halfway up your eyelid. It should not reach all the way to your crease, as this will be reserved for your medium shade.
Add your middle tone. Take your medium shade of eyeshadow and start from halfway up your eyelid, sweeping towards your crease. You should place this color in the part of your lid where it can meet your darkest color.


  • You can blend this color upwards beyond your crease and into your highlighter if you want. The goal is for your eyeshadow to get gradually lighter from your lashes to your brows.
  • Use a little to blend the dark shadow on your lower lash line. Add it the remainder of the way under your bottom lashes.
Blend your colors. Clean your eyeshadow brush by washing it with face soap or shampoo and water, or by spritzing it with an antibacterial makeup brush cleanser. Dry the brush completely on a cloth or towel before using it to blend the shadows. Then, sweep the brush in soft, broad strokes across your lid at the places where the different shades of eye shadows meet.


  • Blend in strokes that go in the direction of your lash line (horizontally), but create the appearance of color blending upwards.
  • Make sure that your lash line is the darkest part of your eyelid, and if necessary apply a bit more of your darkest shadow directly to your lash line as you blend upwards.
  • Don’t forget to blend outwards and the edges of your eye, so that your shadow softly fades into your natural skin tone. The same should be done for the color that has been placed underneath your eyes.
Add your eyeliner. For an ultra-dramatic smoky eye, it is best to used a smudged eyeliner look. Use a chunky eyeliner pencil to draw a thick line across your upper lash line only. Then, use your makeup brush or fingertip to blur the edges upwards.


  • Tightline the inside rims of your eyes to add extra darkness. Draw a line on the part of your eyelid that is nearest your eyeball, directly under your upper eyelashes.
  • If you add eyeliner on your bottom lashes, only bring it as far in as the dark color goes on your lower lashes. Be sure to taper the end of the line though, and blend it into the shadow so that it doesn’t look too harsh against the color.
Add your mascara. Carefully apply your mascara to avoid getting any on your eyelid. Apply it to your upper lashes first, and then a quick coat to your bottom lashes. Wiggle the brush between your lashes to help separate and define them. Avoid using more than two coats of mascara so that you don’t create unsightly clumps and lumps in your lashes.


Clean off any excess makeup. If any of the eyeshadow or mascara spilled onto your cheeks, sweep it away with a large makeup brush. Use big, fast strokes to avoid smearing it into your skin. If you do happen to accidentally smear your eyeshadow, use a q-tip dipped in makeup remover to erase the mistake, and then use your blending brush to blend the area back to its prior state.

See ! How easy is to get a perfect exquisite look .. Now just follow these simple steps & make your self beautiful...

Thursday 29 August 2013

ENGIN OZTURK:

Engin Ozturk is a Turkish actor well known for his role as Saleem Yasharan, the antagonist in Fatmagul, was born on 9th September 1980 in Istanbul.He began working as an amateur Dj in 1997. He changed his style to house in 1998 and stuck with this style for four years. His ambition towards self-development led him to turn into progressive style. He has been dealing with tribal house for the last 2 years. His keen interest on music also led him to begin production. He is currently working professionally and he released his first EP Perfect Drums under Quanza Records label in 10 October 2008. He also serves as a guest dj for the same label and continues to release records and remixes.


Name: Engin Ozturk
Date Of Birth: 9th September 1980
Place Of Birth: Istanbul, Turkey
Occupation: Actor, Model, DJ
Star: Virgo
Height: 6.0 feet & 1/2 inches
Weight: 80 Kg
Eye Color: Green

Hair Color: Blonde


He has also taken parts in many other activities too that are :
  • Therapist
  • Deep Club
  • Club Bianca
  • Shaker
  • DeePOcean
  • Club Zoi
  • X-Trendy
  • Alternatif
  • Mask
  • Club Gate
  • Club XS
  • Hawana (izmir)
  • Fly (ayvalık)
He also took part in many organizations and festivals too…


He has now also signed for Mera Sultan 4th season as 4th son of Sultan Suleiman & Hurrem.

Wednesday 28 August 2013

Engin Ozturk in Mera Sultan

Engin Ozturk commonly known as Salim Yasharan for his role in Fatmagul  (Turkish drama played on Urdu1) has now sign up for the season 4 of Mera Sultan (Muhteshem yuzyil) to appear as Saleem Sultan 4th son of Sultan Suleiman & Hurrem. This role was first given to Kivanc Tatlitug but after when he denied for the role it comes to Ozturk & he accept the proposal. So guys be ready to watch Salim Yasharan as Saleem Sultan again on our TV screens. Only on Geo Kahani.

Tuesday 27 August 2013

Beautiful hands are the most beautiful display

Imagine if on her beautiful face & perfect body  she didn't has beautiful hands !What would be her personality show then?
Hands are your representatives ! It is often said that even if you have no words to define yourself, your hands can tell infinite stories about you. so it is better to take a good care of your hands as taking care of your hands is as essential as taking care of your skin and body. They are reflective of your age, background and a lot more than meets the eye. There is no point in putting on gorgeous nail colors, dressing up in fancy clothes or dolling yourself up in expensive makeup if your hands remain neglected.

More often than not, hands play an important role in communication such as expression of self and emphasis of a point through different gestures and can thus be considered the most used parts of our body. Imagine what life would be like without hands as we need them in every task that we do on a daily basis. This is why many people are vain about their hands. Likewise, it is pleasant to see hands that are clean and well-maintained. Dirty and unkempt hands may create a negative first impression of you.It can, however, be difficult to maintain the softness and cleanliness of hands. The main contributing factor to the challenge women face in maintaining their hands. Just by following a few simple tips, any woman can ensure that her hands retrieve their health again.


Basic Hand Care Tips


  • Use rubber gloves while washing dishes or doing laundry as well as while  performing heavy duty chores such as gardening.
  • While washing your hands, use mild pH soaps and make it a point to immediately apply lotion on them. Do not let the skin on your hands become dry as it leads to the formation of wrinkles.
  • Get manicures from reputable spas or nail salons and ensure they follow the sanitary protocols.
  • Make sure that all the hand care equipment at the salons has been pre-sterilized to avoid chances of infection.
  • Exposure to sun leads to skin damage. Thus, it is recommended that you use a sunscreen lotion or sunblock cream before venturing out. Keep your hands covered with gloves if you can.
  • Moisturize your hands at least four times a day and try to do it every time you wash them.
  • Use your face exfoliator on your hands at least once a week.
  • Apply your face cream on to your hands before you go to bed on a weekly basis.
  • To get rid of dryness on your hands, wet them again after washing them with soap. Pour salt on your hands and then scrub them under water. Dry hands and apply moisturizer on them.
  • For greasy hands, rub cornmeal on them after washing.
  • One of the best ways to avoid fungal infections is to keep hands warm and patting them dry after washing. Cold hands often weaken the body’s immune system by leading to illnesses such as influenza and sore throat.
  • Special treatments such as a warm oil bath and herbal therapies can keep your hands soft and supple for a long time. Simply soaking your palms in hot water mixed with glycerin, lemon juice and rose water can also be of great help in acquiring soft skin.
  • Vitamin B deficiency can cause ridged nail beds, while lack of calcium can result in brittle and dry nails that chip off easily. For this purpose, be sure to eat foods high in these nutrients or take supplements to improve the look of your nails.

How to Keep Hands Gorgeous and Soft

  • Cucumber juice and glycerin can be mixed and applied on the hands once a day. This mixture moisturizes hands and adds glow to them.
  • Another great tip to keep your hands looking beautiful is a combination of milk cream, ground almond, glycerin and lemon juice. This concoction bleaches your hands as well as removes dead skin cells from them.
  • Massaging your hands with olive oil or even tomato pulp leave them soft, supple and glowing.
  • Honey and orange juice contain alpha-hydroxy acid (AHA) that has been proven an excellent way to protect hands from harsh sun rays and remove tan. AHA is found in grapes and other acidic fruits such as oranges, lemons, and strawberries, helping in the reduction of wrinkles and sun damage.
  • Application of egg white also makes a good hand mask. It makes the skin tight and prevents formation of wrinkles.

Hand Care Treatments That Will Not Disappoint

  • Rosewater Hand Massage: Mix about 1 teaspoon of glycerin, lemon juice and 5 drops of rose water in a small bottle. Use it to massage your hands and cuticles for at least 15-30 minutes.
    What if my hands were ugly ?? Thank God for such a beautiful hands
  • Nail Soak: Take 1 cup of bottled water, juice of 1 lemon, 1 tablespoon of aloe vera gel and 10 drops of lemon essential oil. Use it as a finger soak for about 10 minutes, alternating each hand.
  • Nail Manicure Treatment: Take a bowl and mix equal parts of distilled water and witch hazel, 1 1/2 teaspoon honey and 1/2 teaspoon alum powder. Soak your nails for approximately 10 to 15 minutes and rinse with cool water. Repeat for both hands and discard the mixture.

Easy To Follow Tips On Nail Care

  • Cut Your Nails After Your Shower or Bath: When you need to trim your nails, soak them for a while for best results. They are more pliable and easy to trim without cracking. You do not need to specifically soak the nails if you are short on time and can cut them right after your shower or bath.
  • Push Back Cuticles: Once done with clipping your nails to the desired length, use a cuticle stick and give your cuticles a gentle push back. Make sure that you push them and not cut them. If your cuticles are dry and cracking, skip pushing them back and put a dab of cuticle oil (readily available in any supermarket) on them every day after your shower and they will be healed in no time.
  • Wear Clear Polish: Nothing looks worse than chipped nail polish but it is also understandable that a manicure does not last. Using clear polish gives your nails a smooth, shiny finish and even if it does start chipping, no one will be able to tell. A good choice would be a nail hardening polish, which if applied daily, can harden your natural nail.
  • Nail Starting to Peel? Denim Should Do the Trick: If you notice that your nail is starting to break or peel midday, try filing it a bit on your jeans. Although this method may not be comparable to using a nail filer, it can soften the edges enough to keep the the minimize breakage until you can take care of it at home by filing your nails properly.
  • Moisturize Your Nails: Your nails will get dehydrated just like your skin, especially if you regularly use nail polish remover on them. When you are applying your body or face moisturizer, add a bit on to your nails too.
Beautiful hands are the result of dedicated hand care and maintenance. Take good care of your hands and treat them well. Follow the above mentioned tips and keep your hands looking soft, supple, young and beautiful forever! It will not only make your hands beautiful but your over all personality will also look enchanting by this.

Monday 26 August 2013

Katrina VS Beren ;)

I have reading this sentence more than thousands a time that Katrina Kaif (Indian actress)& Beren Saat (Turkish actress) are so alike! Like seriously I can't even believe this ...
Before some days or weeks i have posted about celebrities look alike that was a post made by of one of my reader ! she really done a nice work & i found there many stars resembling each other seriously but there i was so shocked how Beren could look alike Katrina! they have no such similarities..
However i am here now asking you guys to show your thinking about this if they are same or not ?
If yes then how are they same ?
If not then who is better ?
Beren or Katrina ?
Comment your thinking and support your favorite !
Let people know what is majority thinking about this ???

Thursday 22 August 2013

Rabia / Raaba / R4bia

 What is Rabia/Raaba/R4bia ???
Seeing this word many times on facebook?
Have you seen the yellow and black colored four fingered hand sign on social media recently and want to know that what is it?
Why people are posting about it on internet?
Why are the making this sign their display?

Let me tell you! Actually Raaba/Rabia or R4BIA is four in arabic, and this hand sign by raising 4 fingers has become the symbol of the massacre in Egypt as well as Rabaa al-Adawiya Square where the anti-coup protests take place.


Rabia means four in Arabic and it's the symbol of the incident of Egypt Massacre. More than 181 people were killed last Friday in mass rallies staged by Morsi supporters in several Egyptian cities to protest Wednesday's violent dispersal of their two main protest sites Cairo's Rabaa al-Adawiya and Giza's Nahda squares on Wednesday.
The Health Ministry said that at least 638 people had been killed in nationwide violence since Wednesday, including 288 in Rabaa and 87 in Nahda.
#R4BIA| “Rabaa sign” done by raising four fingers has become the symbol of the massacre in Egypt and Rabaa al-Adawiya Square where the anti-coup protests take place. 

“Rabaa” meaning four or the fourth in Arabic has become the sign of anti-coup protests in Egypt. Just a few hours before the massacre on August 14, anti-coup protesters in Egypt tried to voice their demands to the world by raising their four fingers. Erdogan (Prime minister of Turkey) showed solidarity with Muslim brotherhood by showing 4 fingers. Muslims from all over the word embraced this symbol for the protest of killings of Muslims in the world.
You can show your support and solidarity with Egypt's Muslims by replacing your current display picture with RABIA SIGN picture >>>


And change your covers of facebook too with this picture <<< to show that you are with Egypt & to show Muslims unity in the world..


May Allah the Almighty help them and save them from this
massacre....Ameen

Wednesday 21 August 2013

Merve Boluğur

Merve Boluğur (born September 16, 1987 in Istanbul) is a Turkish actress well known for her role as Zainab in Kuzey Guney as girl friend of Kivanc Tatlitug & friend of Oyku Karayel . She is very pretty yet talented actress of Turkey & have done incredible job in her drama Kuzey Guney. She has dated to famous stars of Turkey. First is Tolgahan Sayisman & second one is Burak Mursaloðlu.


Merve Boluğur
Born September 16, 1987 (age 25)
Istanbul, Turkey
Occupation Actress
Years active 2006 - present
Website
http://www.mervebolugur.net/

Height        5"8
Weight        58Kg
Eye Color   Black
Hair Color   Dark Brown
Star           Virgo


Filmography

As Zainab In Kuey Guney
  • Kuzey Güney (2011-2013) TV Series .... Zeynep
  • Küçük Sırlar (2010) TV Series .... Ayşegül
  • Kül ve Ateş (2009) TV Series .... Hayal,
  • Hoşçakal Güzin (2008) .... Bahar
  • Aşk Yeniden (2007) TV Series .... Eylül
  • Gomeda (2007) (post-production)
  • Keloğlan Kara Prens'e Karşı (2006) .... Ayşegül
  • Acemi Cadı (2006) (Mini) TV Series .... Birgül
She has also been appeared in many ads too & is much loved & praised by her fans not only in Turkey but in Pakistan & Arab World too :)

Monday 19 August 2013

Hazar Ergüçlü

Hazar Ergüçlü (Commonly known as Simay in Pakistan because of her role in drama serial Kuzey Guney on aired now a days in Pakistan on Urdu1) (born in 1992, Nicosia, Northern Cyprus) is a Turkish Cypriot actress. She is best known for her role as Simay Canaş in the Turkish soap opera Kuzey Güney. Ergüçlü is also known for her role as Rukhsar in Derviş Zaim's 2010 film the Shadows and Faces. She is a really pretty girl with cute smile and enchanting look. Pakistanis are liking her a lot...


Hazar Ergüçlü
Born 1992
Nicosia, Northern Cyprus.
Occupation Actress
Years active 2010–present
Height                   5"7
Weight                  52Kg
Eye Color              Black
Simay in Kuzey Guney
Hair Color             Dark Brown

Filmography

Film
Year Film Role Notes
2010 Shadows and Faces Ruhsar
2012 Full of Hunger Sena (post-production)
Television
Year Show Role Notes
2011–present Kuzey Güney Simay Canaş TV series

Friday 16 August 2013

Fatmagul & Kareem singing together in drama Fatmagul :')

Here i am posting a beautiful memory of Fatmagul akhir mera kasoor kya when BerEngin (Fatmagul & Kareem) are singing together a melodious folk song. Specially on visitors demand... Listen it & enjoy the wonderful memories of this beautiful couple...
Link is given below with English subtitles...

Click here to watch the song

Thursday 15 August 2013

Beren Saat & Engin Akyurek Singing

Here i am sharing a video of BerEngin ( Beren Saat & Engin Akyurek )singing together :') They both are looking so cute together as always and their voice aaaaah ! what can i say :) just awesome ...
Listen it & enjoy it ....


Click here to watch the song

Sunday 11 August 2013

14 August ; Pakistan's Independence Day

14th August, a very familiar date to all Pakistanis. Yes, it is our Independence Day. This day is celebrated each year to pay tribute to all our ancestors who fought bravely for our independence. This day promotes patriotism, love for one's country and national unity. 


Individuals all over Pakistan observe Independence day with great devotion and zest. Many people who go to the Independence day parades dress up in green and white, the Pakistani flag’s colors; Where White represents peace while Green symbolizes prosperity and good fortune. Individuals visit national landmarks and places of national significance to observe Independence Day. This is additionally an opportunity to meet relatives, trade blessings and visit recreational spots.

Pakistan’s national flag is hoisted on public, private buildings, residences and monuments at dawn, basically everywhere. Official buildings are embellished and brightly lit. The prime minister and president address and congratulate the nation and talk about the day’s significance. Streets, shops, parks and houses , everywhere in Pakistan, are decorated with candles, oil lamps and pennants.  Firecracker shows are assembled on every independence eve.

Pakistan's Independence Day additionally pays praise to individuals who dedicated their lives for Pakistan's freedom movement and made sacrifices to accomplish Pakistan's freedom. Guards changing function takes place at national monuments, including the tombs of Muhammad Iqbal, Known as Allama Iqbal; Poet of East and beloved Muhammad Ali Jinnah, founder of Pakistan,  Quaid-i-Azam,
 
Events held during the day include special theater shows, national song competitions, concerts, and Independence Day pageants. Radio and television stations broadcast national songs and specially prepared Independence Day programs.

Background


The Indo-Pak subcontinent remained a British state from 1849–1947. The subcontinent's tenants did not affirm of the British control in united India. An uprising that happened in 1857 in the end formed the state of a freedom movement, which represents the endeavors of the general population of British India in gaining their freedom.
Muslims governed the subcontinent before the British attack and suffered because of the 1857 uprising against the British East India Company. Pioneers, for example, Sir Syed Ahmed Khan and Syed Ameer Ali worked steadily for the Muslim individuals' political advancement.


The Indian National Congress was founded on 1885, that later on became British India’s largest political party. Major Muslim political leaders, including Muhammad Ali Jinnah, were its members and worked towards Hindu-Muslim unity and India’s independence.
The All India Muslim League was formed in December 30, 1906 in result of growing demands for a free Muslim state. In 1930 Mr Iqbal gave the idea of a separate Muslim country that would geographically consist of the Muslim majority areas in the subcontinent and Mr Choudhary Rahmat Ali named the state Pakistan. The word Pakistan is a conjunction of two words Pak meaning Pure and Stan meaning Land. (Writing this gave me goosebumps)

Strong Hindu nationalism brought forth the Two Nation Theory, a belief system that is certify as the reason for Pakistan's creation. In 1940 the Pakistan Resolution was passed in Lahore demanding more noteworthy Muslim self-governance in British India.

After World War II, it was expected that the British colonies would soon disintegrate. The Pakistan Movement, spearheaded by Muhammad Ali Jinnah, resulted in creating a separate Muslim state, Pakistan. Pakistan gained independence from the British rule on August 14, 1947. (Alhamdu lillah..)


As we have get this country after all these great sacrifices and hardwork now it is our duty to work for it's peace, prosperity, success and harmony. Let's not take this amazing homeland of ours for granted. Let's be united and devote our lives for the betterment of the future of our beloved country.

HAPPY INDEPENDENCE DAY Y'ALL! 


Pakistan Independence Day
 May Allah bless our country with peace and prosperity & save it from terror. Long Live Pakistan !!

Saturday 10 August 2013

How to get curl hairs without using heat

Turks are much more attracted towards curl hairs and they often dressed their hairs curly to get enchanting look. In most of the series being on aired in Pakistan every next girl character dress her hairs curly by putting rollers either with flat iron or the curl one or without heat & not only in Turkey , in Pakistan too there are many or i can say thousand of girls trying to make their hair curls. Am i wrong ?? no i aren't !! I'm right. 

Even if you weren't born with bouncy, glossy curls, you can always convince your hair to spring up for a day or two - all you need to do is use the right technique. There are many methods of curling your hair - you can use a curling iron, a flat iron, hair rollers, braids or scrunching. Find a method to curl your hairs without using heat; Perfect curls without heat aren’t just a dream! In fact, there are many ways to achieve various types of no heat locks that last and last and last! And whether you’re interested in giving your straight tresses an occasional makeover or looking for ways to give your wavy or curly hair some definition I’m sure you’ll find these upcoming 7 tricks for no heat curls very useful:

1. Invest in a Potent Curl Cream

  If you already have curly or wavy hair, a great curl cream is pretty much all you need to get perfect curls with no heat whatsoever! This product should smooth down and define your curls, making them look neat, polished and frizz-free and the best thing about it is that it doesn’t need to be reapplied every day. Simply brush and dampen your hair to re-active the product and you’ll have gorgeous curls or waves every day!


2. Say “Yes” to Shine&Hold Water Based Sprays

These easy to use, non-sticky water based solutions are the ideal thing to use on silky, straight, difficult to adopt a curl pattern hair! All you need to do is choose the one that works best for you and spray it on your damp hair before you twist, pin or try any of the methods for no heat curls listed below.


3. Give Flexirods a Shot

Flexirods are a perfect choice for all of you hoping to get a set of gorgeous spiral no heat locks! I absolutely love them and the truth is that, once you get used to them, they are fairly easy to use! This no heat styling method enables you to customize the size of your curls as well as the volume by simply wrapping more or less hair onto the rod.


4. Twist It

 Have you ever tried twists or knots? Well, you should know they aren’t just a great protective style but a way to get perfect curls without heat as well! Knot your hair in case you want tiny, tightly coiled curls, twist strands two by two to get them to adopt that nice spiral shape or try a different braid/knot or twist pattern in case you want to experiment! There are plenty of great how-to’s all over YouTube so I’m sure you’ll have no problem finding a method that works best for your hair.


5. Use Your Fingers


Still wondering how to curl hair without a set of hot rollers or curling iron? Well, here’s a neat trick to help all of you curly or wavy-haired ladies install a curlier pattern into hair that tends to frizz, pouf and loose its curls as it dries! Simply comb your wet hair using a wide toothed comb them twist individual sections around your finger. Remove your finger gently them more on to the next section and keep doing so until all of your hair is styled exactly the way you want it. Then take a large silk scarf and loosely wrap it around your head to get your hair to retain the given texture. Remove after 30 minutes to an hour and let the rest of the drying process happen naturally.


6. Try Some Innovative No Heat Curling Methods

Are regular rollers giving you troubles at night? Well, this video right here will show you how to curl hair in a very budget-friendly, hassle-free way that won’t make you lose big chunks of your beauty sleep! Yup, my ladies, waking up with a sore scalp is history and I might say one we don’t want to see repeated!


7. Experiment with Pin Curls

  Retro pin curls aren’t only a fantastic, super sexy, super glam hairstyle to wear outside but a fantastic way to get big perfect curls without heat as well! All you’ll need is a big pile of bobby pins and some patience and your transformation can start! This curling method does take a lot of time at first but is very comfy to sleep on as well plus you can always tie a scarf over it and wear it rockabilly style until you’re ready to take your curls down.

Aren't all these amazing ?? Then try them on yourselves too to get more enchanting and exquisite look ;) You can easily have them and enjoy your beauty !!!